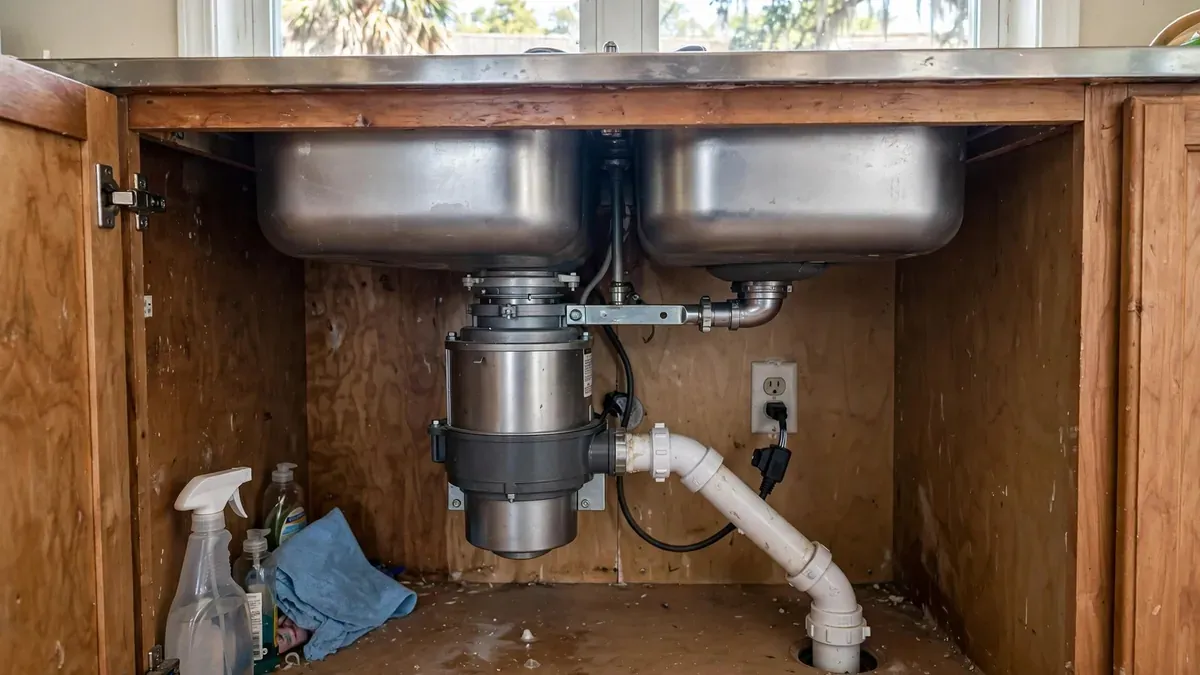
Installing a garbage disposal in Morton Grove, IL means removing the old unit or sink flange, mounting a new disposal under the sink drain, connecting it to the trap and dishwasher, wiring it to power, and testing for leaks. An InSinkErator-style disposal is built to bolt up in a few clear stages. A handy homeowner can do it in a few hours, but the wiring and the drain connection are the parts worth double-checking.
This guide covers the tools, the steps, and the places where installs go wrong. If you would rather have a plumber do it, call (847) 281-8626. The line is staffed at all hours, and a same-day visit is often available depending on the schedule.
What to gather first
A disposal install uses few tools, but missing one halfway through is a nuisance. Collect these before you start:
- A flat-blade screwdriver and a Phillips screwdriver
- Pliers and an adjustable wrench
- Plumber's putty
- A hacksaw or tubing cutter for the drain pipe
- A bucket and rags
- Wire strippers and wire nuts
- A disposal power cord kit if the unit does not come with one
Choose a disposal with the horsepower and mount style that suit your sink. A quick-lock mount makes later swaps simple. Check that the new unit fits the space under your sink, since a deep unit can bump into a shelf or the dishwasher hose.
Before you cut anything: power and water
Turn off the power to the disposal circuit at the breaker, and confirm it is dead with a voltage tester. Remove the old unit's wiring cover and check again. Never trust a wall switch alone, because the switch may be on the wrong side of the circuit.
Then clear the cabinet under the sink. Set a bucket under the trap, since water in the trap will spill when you disconnect it.
Wet electrics
If water is on the floor near the disposal or the outlet, stay clear. Flip the breaker only when the floor by the panel is dry and you can reach it safely. Otherwise leave the area and call a plumber or an electrician.
Step by step
Installing the disposal
- 1Remove the old unitloosen the mounting ring and lower the old disposal. Disconnect the drain elbow, the dishwasher hose and the wiring.
- 2Clean the sink openingscrape off old putty from around the sink hole. A clean surface helps the new flange seal.
- 3Set the sink flangeroll a rope of plumber's putty and press it around the underside of the flange lip. Seat the flange in the sink hole.
- 4Build the mounting assemblyslide the gasket, backup ring and mounting ring onto the flange from below. Fit the snap ring into its groove.
- 5Tighten the screwsturn the three mounting screws in alternating steps until the assembly is snug and the putty squeezes out evenly.
- 6Prepare the disposalremove the cover plate on the unit. Knock out the dishwasher plug if you have a dishwasher.
- 7Wire the unitconnect black to black, white to white and green to the ground screw, then replace the cover plate.
- 8Hang the unitlift the disposal to the mounting ring, line up the tabs and twist it into place.
- 9Connect the drainattach the discharge elbow with its gasket, then connect it to the trap with a trap adapter.
- 10Connect the dishwasher hoseslide the hose onto the inlet nipple and secure with a clamp.
Work slowly on the mounting step. Uneven tightening gives a leak at the flange that is hard to fix later.
The dishwasher knockout plug
The knockout plug is the small disc inside the dishwasher inlet on the side of the disposal. If you connect the dishwasher hose without knocking out the plug, the dishwasher cannot drain. Water backs up into the dishwasher or the sink, and the mess tends to appear after the first full cycle.
Use a screwdriver and a hammer to tap the plug through. Then fish the plug out of the disposal chamber with pliers or tongs. A plug left inside can jam the grinding wheel on first use. If you have no dishwasher, leave the plug in place.
Dishwasher drain loop
The hose should loop up high under the counter before it reaches the disposal. That loop, or a proper air gap where required, helps prevent dirty water from flowing back into the dishwasher. Check how your home's dishwasher is set up and keep the loop in place after the install.
Trap and drain connection
The drain side of the disposal needs a trap, a U-shaped section of pipe that holds water and blocks sewer gas. The trap sits below the disposal, and the pipe slopes down to the wall. Gentle slope matters because flat or backward-pitched drain pipe collects food waste.
Use plastic or metal slip-joint fittings with fresh washers. Hand-tighten, then give a small turn with pliers. Overtightening cracks plastic nuts, and a loose nut leaks.
| Part | What it does | Common mistake |
|---|---|---|
| Sink flange and putty | Seals disposal to the sink | Too little putty |
| Mounting assembly | Holds the disposal in place | Uneven screw tension |
| Discharge elbow | Sends waste to the trap | Missing gasket |
| Trap and trap arm | Blocks gas, carries waste | Backward slope |
| Dishwasher inlet | Drains the dishwasher | Plug not knocked out |
Wiring and power
Most disposals connect to a switch on the wall through a short cable and a hard-wired connection or a plug. If you are not comfortable working with household wiring, hire an electrician. A mistake with electricity near a wet sink is dangerous.
The village adopted the 2011 National Electrical Code, so wiring in Morton Grove should follow it. In practice, the disposal needs a grounded circuit, a proper cable clamp where the cable enters the unit, and a cover plate that stays on. If your kitchen outlet needs a new circuit or has no ground, call an electrician before you install.
Test run and first-use checks
Restore power. Run cold water into the sink and turn on the disposal for a few seconds. Look under the sink for drips at the flange, the discharge elbow, the trap and the dishwasher hose.
If everything stays dry, run the dishwasher briefly and check again. A slow drip that you only see with a dry paper towel is still a leak, and it will worsen with time.
Break-in habits
Feed the disposal soft food scraps in small amounts, with cold water running. Avoid grease, bones, fibrous stalks such as celery in big handfuls, and coffee grounds in quantity. Cold water helps solid fats move through the pipe before they harden. If the drain slows down after installation, our drain cleaning service can clear the line.
When to call a plumber
Some installs are best left to a licensed plumber. Call if the old sink flange is stuck, if the trap arm does not line up, if the drain pipe in the wall is corroded, or if you have no experienced hand for the wiring. The same goes for a unit that jams or hums after install, which our garbage disposal repair page covers.
We serve Glenview and Niles as well as Morton Grove. In any of these towns, a poor drain connection under the sink is among the most common reasons for a callback.
Morton Grove note
The village enforces the Illinois 2014 Plumbing Code along with its own changes, and that code covers the trap and drain you connect under the sink. The village also uses the 2011 National Electrical Code, which governs the disposal wiring.
Normal plumbing maintenance does not need a permit, but relocating plumbing fixtures does, so moving the sink drain may. If you are unsure about a permit, call the village building office. Remember to knock out the dishwasher plug if a dishwasher shares the disposal.
Source type: Village of Morton Grove codes and building permits pages
Questions about garbage disposal installs
Frequently asked questions
Normal plumbing maintenance does not need a permit, and swapping a disposal under the same sink usually falls into that bucket. Moving fixtures or changing the drain layout may need one, so call the village building office to confirm.
Many homeowners take a few hours, including time for removing the old unit and cleaning the sink opening. A plumber can usually finish sooner.
The dishwasher knockout plug may still be in place, or the hose may lack a high loop. Check the plug first.
Check with the system's maker or installer first. Disposals add solids to a septic tank, and many homes in the area are on sewers, so this applies rarely here.
It means the wiring should be grounded, secured with the right clamp, and connected inside a closed cover plate. If you are unsure, an electrician can check the circuit before you install.