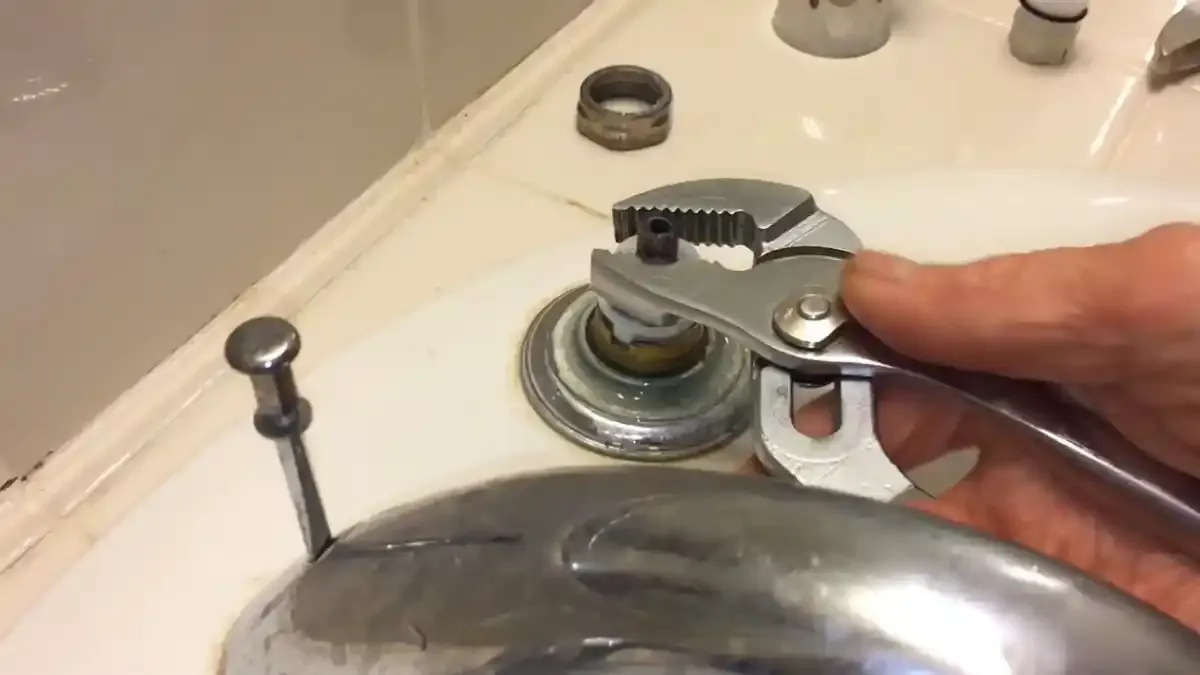
Plumbing a shower faucet means setting a mixing valve inside the wall, running hot and cold supply lines to it, connecting a pipe up to the shower arm, and then covering the valve with a trim kit. The wall work is called the rough-in. The visible handle and plate come last. Get the rough-in wrong and you will be cutting tile to fix it.
In Illinois, the person who installs or alters plumbing must be licensed. This guide explains each stage so you understand what the plumber is doing, what you can decide ahead of time and where the usual mistakes happen.
The six stages from bare studs to a working shower
Every shower valve install follows the same order, whether the bathroom is a gut remodel or a simple swap. Knowing the order helps you read a quote and spot a missing step.
The shower faucet install, start to finish
- 1Shut off and drainThe plumber closes the main shutoff, opens a low faucet to drain the lines and confirms the pipes are dead before any cutting.
- 2Set the rough-in valveThe valve body is fixed to a support board in the wall at the height you picked, with its face set to the depth the trim kit requires.
- 3Run the supply linesHot and cold pipes connect to the valve ports, and a riser pipe runs up to the shower arm fitting and, if you have one, down to a tub spout.
- 4Pressure testThe lines are capped and filled to check for leaks while the wall is still open. This is the cheapest moment to find a bad joint.
- 5Close the wallBacker board, waterproofing and tile go on, with the valve body protected and the front edge left reachable.
- 6Install the trimThe cartridge, handle, plate and showerhead go on, and the plumber tests flow, temperature and the drain.
Most failures trace back to step 2 or step 5. A valve set too deep or too shallow will not accept its trim plate, and a wall closed before the pressure test hides every leak until the ceiling below stains.
Choosing the valve: what the cartridge actually does
The valve body is the part buried in the wall, and the cartridge is the replaceable core inside it. When people say a shower faucet is leaking, the cartridge is the usual cause, not the whole valve. Picking a valve type is the biggest decision you make before the walls close.
A pressure-balancing valve reacts to sudden pressure changes. If someone flushes a toilet or starts the dishwasher, it adjusts so the shower does not swing hot or cold. A thermostatic valve goes further and holds a set temperature, which is helpful in homes with older hot water systems. Both are described as anti-scald protection in general terms, since they limit how hot the water can get at the handle.
| Valve type | What it does | Best fit | Trade-off |
|---|---|---|---|
| Pressure-balancing | Evens out pressure swings between hot and cold | Most single-handle showers | Does not hold an exact temperature |
| Thermostatic | Holds the temperature you dial in | Multiple showerheads or body sprays | More parts and a larger valve body |
| Two-handle compression | Separate hot and cold stems | Matching an older style | Easy to scald, stems wear out |
| Diverter with a tub spout | Sends water to the tub or the head | Tub and shower combinations | Diverter can fail and leak at the spout |
A homeowner who wants one showerhead and a plain handle is usually well served by pressure-balancing. If you want a rain head plus a handheld, ask the plumber about a thermostatic valve with separate volume control.
Supply lines and the support behind the valve
Behind the wall, the valve needs solid backing. A plumber nails or screws a support board between two studs so the valve cannot flex when you turn the handle. Without it, constant movement fatigues the joints and a slow leak starts inside the wall.
Supply lines are usually copper or PEX. Copper is joined with soldered fittings and holds up well in exposed spots. PEX is flexible, needs fewer fittings and is faster to run through framing. The best choice depends on the existing pipe in your home, since the plumber must connect new lines to what is already there. Mixing materials is common, but the transition fittings must be made for the job.
Hot on the left, and why it matters
Standard practice is hot on the left and cold on the right when you face the valve. Reversing the supply lines is one of the most common DIY errors, and the result is a handle that feels backward. Some cartridges can be flipped to correct this, but it is better to get it right at the rough-in.
Water pressure and the shower arm
The riser pipe and shower arm should be secured with a drop-ear elbow, so the showerhead does not wobble. If the showerhead has weak flow, the issue may be scale in the head or a partly closed stop, not the valve. Check those two before you open a wall.
Testing before you close the wall
A pressure test is the stage most often skipped by rushed jobs and the one that saves the most money. With the new lines capped, the plumber charges the system with water or air and watches for a drop. A leak found now means a fresh joint and ten minutes. A leak found after tile means a demolished wall.
Ask whether the plumber tests before the wall is closed and whether the shower pan or tub is also flood-tested. Pan tests run for several hours, so book the tile crew accordingly.
A simple leak check you can do yourself
After the trim is on and the shower has run for ten minutes, turn it off and look at the ceiling or wall below and beside the shower. Check again after 24 hours. A damp spot, a musty smell or a bubbling paint patch means a leak behind the surface and a plumber should look at it.
Trim, access panels and the part you will use every day
The trim kit is the handle, plate and escutcheon you see. It must match the valve brand and model, because rough-in valves from different makers are not interchangeable. This is why you should choose the trim before the wall is closed, not after.
An access panel is worth considering. On the back side of the shower wall, often inside a closet or an adjoining room, a small panel lets a plumber reach the valve without cutting tile. Not every layout allows it, but when it does, a future cartridge swap or repair becomes a small job. If the back of the wall is a bedroom closet, ask about it before the drywall goes up.
Planning a shower valve job?
Talk to a licensed plumber about valve type, access and testing.
When a shower faucet is a repair, not a rebuild
Many shower problems do not need a new valve. A drip from the spout or head, a handle that is hard to turn, or water that never gets quite hot are usually cartridge or stop issues. A plumber can replace a cartridge in under an hour on many valves, and that is far cheaper than new work in the wall.
If the valve body itself is cracked, corroded or leaking at the ports, replacement is the honest fix. That means opening the wall or using the access panel. You can read more about common leaks and parts on the page for faucet repair, which covers cartridges, stems and seats in plain terms.
For a new bathroom, a moved shower or a wall opened for other reasons, the work belongs under plumbing installation, where the plumber plans supply lines, drains and venting together. We also serve neighbors in Skokie and Niles, so the same crews cover both sides of the village line.
What a shower faucet job costs, in terms of factors
We do not publish dollar figures here, because a real number depends on what is behind your wall. The things that move the price are the same on every job.
What changes the price of a shower valve job
- Valve type: Thermostatic and multi-outlet valves cost more than a single pressure-balancing valve, and the trim kit adds to it.
- Wall access: A back-side access panel or an open stud bay is far cheaper than cutting tile.
- Pipe material and length: New copper or PEX runs and any transitions to old pipe add parts and labor.
- Moving the valve: Relocating a fixture takes more plumbing, framing and a permit.
- Repair or replace: A cartridge swap is a small job, a cracked valve body is a larger one.
- Finish work: Tile, backer board and waterproofing are separate trades that follow the plumber.
A burst or sudden leak behind a shower wall might be covered for the water damage it causes. The valve or pipe that failed is rarely paid for, and a slow drip over months is often excluded. Read your policy before you assume anything.
Want your real number? Call (847) 281-8626.
Morton Grove permits and licensing
Morton Grove note
State law says plumbing work in Illinois, from a new shower valve to a repair, belongs to a licensed person. Licensing runs through IDPH, which offers a public lookup page where you can confirm a name. A genuine plumber's licence number starts with 058-.
In Morton Grove, relocation of plumbing fixtures needs a permit. That matters for a shower if you want the valve in a different wall or the drain in a new spot. Normal maintenance does not need one. For anything in between, phone the village building office at (847) 470-5214 and describe your job. Ask which parts a homeowner may do and which must be left to a licensed plumber.
Source type: village permit guidance and the state plumber licensing lookup
Questions people ask about plumbing a shower faucet
Frequently asked questions
Illinois requires licensed plumbers for installing or altering plumbing. Before you start, ask the village building office which tasks an owner may do alone. Many people replace trim and cartridges only, and leave the valve and pipe work to a licensed plumber.
Many installers set the handle roughly chest height for standing use, but the right height depends on your tile layout and who uses the shower. Decide before the rough-in, because it is hard to move later.
Relocating plumbing fixtures needs a permit in the village. Replacing a worn cartridge or a trim kit in the same spot is normal maintenance. If you cannot tell which side of the line your job falls on, phone the village building office first.
The valve is likely not pressure-balancing, or its cartridge is worn. A plumber can test the cartridge and, if needed, replace the valve with a balancing or thermostatic type.
Yes, the phone line never closes. A visit on the same day is possible if the schedule has an opening. If water is coming through a ceiling below the shower, shut off the main and call right away.
Search the plumber's name on the state IDPH lookup page. A plumber's number begins 058-, while a plumbing contractor's number begins 055-. The village also requires a Village Contractor's License for work inside its limits.